OneSpan Sign for Laserfiche provides the ability to incorporate electronic signatures into Laserfiche documents and send them for signing. This guide covers how to install and configure the OneSpan Sign integration for both the Laserfiche Web Client and Workflow.
Prerequisites
Accounts & Software
OneSpan Sign account (sandbox account recommended for testing)
Administrator account for the Laserfiche Repository
Laserfiche Web Client installed
Laserfiche Workflow installed
Database
MSSQL Server 2012 or higher installed
MSSQL Server user with the following permissions:
Create database
Create table
Create stored procedure
Insert data
Windows Environment
Windows PowerShell 4.0 or higher, with permission to set the execution policy to Unrestricted
Windows account running the PowerShell script with the following permissions:
Create / Modify / Edit folders and files
Create App Pool in IIS
Start / Stop App Pool
Create Website in IIS
Restart IIS
Create Event source in event log
Installation Steps
1. Download the integration package
Download the latest version from:
https://www.onespan.com/integrations/laserfiche
2. Unzip the package
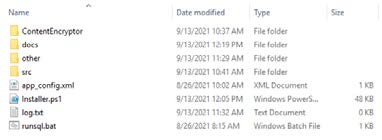
Extract the package to your desired location. The unzipped folder will contain:
3. Configure app_config.xml
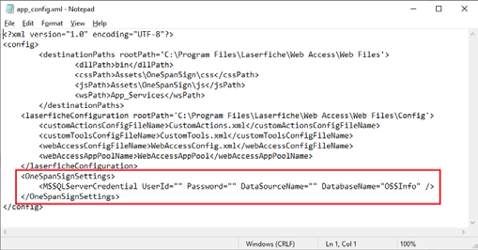
Open app_config.xml with any text editor and fill in your SQL Server credentials:
Field | Value | Notes |
|---|---|---|
UserId | Plain text | Your SQL Server user ID |
DataSourceName | Plain text | Your SQL Server data source name |
DatabaseName | OSSInfo | Do not change, must remain OSSInfo |
Password | Encrypted | Use the ContentEncryptor tool (see below) |
Important: The DatabaseName value must remain OSSInfo. Do not modify it.
To encrypt the password:
Open the ContentEncryptor/ folder.
Double-click ESLConnector.ContentEncryptor.exe.
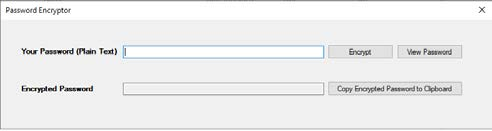
Enter your password in the Your Password (Plain Text) field.
Click Encrypt.
Click Copy Encrypted Password to Clipboard and paste the value into app_config.xml.
Save and close the file when done.
4. Copy the folder to the appropriate server(s)
Component | Copy folder to… | Additional requirements |
|---|---|---|
Web Client | Server where Laserfiche WebAccess is installed | — |
Notification Receiver | Server where you want to install the Notification Receiver | (1)IIS installed; (2)Accessible from OneSpan Sign Notification server (whitelist outgoing IPs — see environment URLs & IPs); (3).NET Framework 4.8+; (4)Access to Laserfiche server and database server. If Laserfiche WebAccess is not installed, also install the Laserfiche SDK runtime. |
Workflow | Server where Laserfiche Workflow server and Workflow Designer are installed | — |
5. Run PowerShell as Administrator
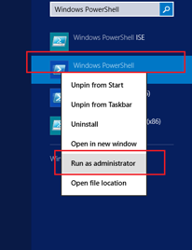
Right-click Windows PowerShell and select Run as administrator.
6. Navigate to the installation folder
cd "your path to installation files"
7. Set execution policy to Unrestricted
Set-ExecutionPolicy -ExecutionPolicy Unrestricted
8. Run the installer
.\Installer.ps1
When prompted, type the component name or its number to install:
# | Component |
|---|---|
1 | WebClient |
2 | Workflow |
3 | Notification |
4 | Database |
5 | Exit |
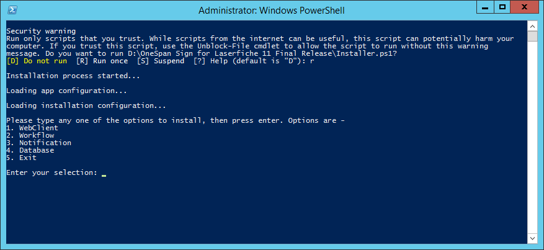
The installer checks prerequisites automatically. Any errors appear in the console and are recorded in log.txt.
9. Install the Database component
You have two options:
Option A — Run SQL scripts manually
Navigate to src\\MSSQLScript\\ and run the following scripts in order:
schema.sql
masterdata.sql
Option B — Run SQL scripts through the Installer
In app_config.xml, enter UserId, DataSourceName, and Password in plain text (no encryption needed for this option). DatabaseName must remain OSSInfo.
Save and close the file.
Copy the folder to the server where MSSQL Server is installed.
Follow steps 5–8 above and select Database (4).
Execution logs are written to src\\MSSQLScript\\log.txt.
Configuration
1. Create the required Repository groups in Laserfiche
Group | Access |
|---|---|
OSS_User | Members have access to the integration in Laserfiche WebAccess. |
OSS_Admin | Members have access to the Configuration tab of the integration UI (administrative actions). |
OSS_All_Transactions | Members have access to all transactions across all Connection Profiles. |
2. Add an admin user to the groups
Add at least one Laserfiche user to both OSS_User and OSS_Admin. This user will perform the initial configuration of the integration.
3. Open the OSS Integration UI
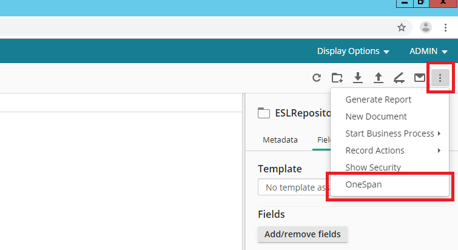
In Laserfiche WebAccess, open the right-corner menu and select OneSpan.
4. Create a new Connection Profile
Select New Connection Profile from the top-right dropdown.
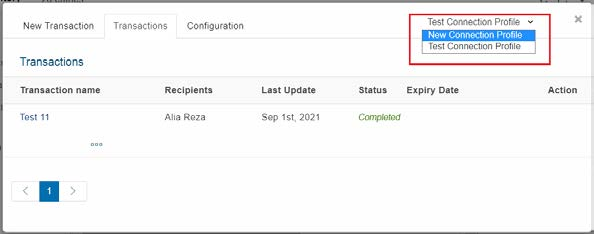
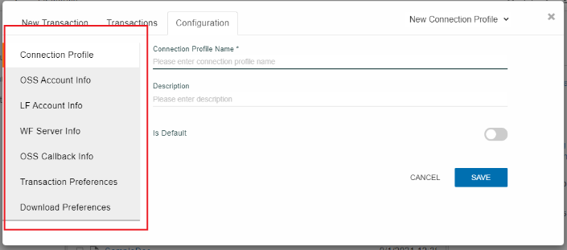
This opens the Configuration tab with the following vertical sub-tabs that must be completed in sequence:
Connection Profile
OSS Account Info
LF Account Info
WF Server Info
OSS Callback Info
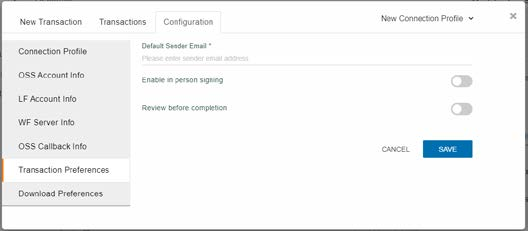
Transaction Preferences
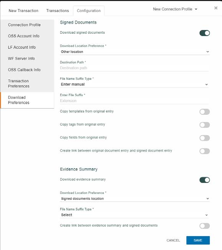
Download Preferences
5. Fill in each configuration tab
Connection Profile
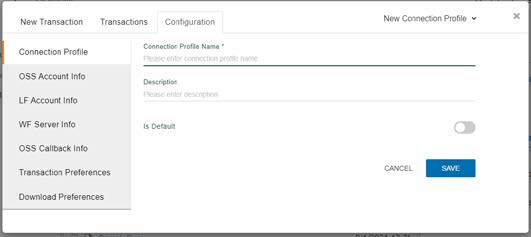
Enter a profile name and optional description. Toggle Is Default if this should be the default profile. Click Save.
OneSpan Sign Account Info
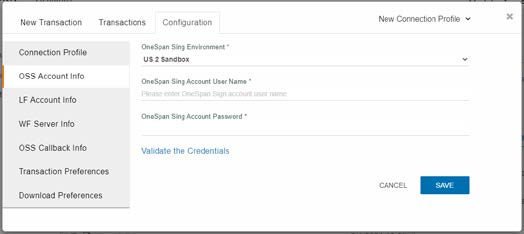
Select your OneSpan Sign environment (e.g., US 2 Sandbox), enter your OneSpan Sign account username and password. Click Validate the Credentials to test.
Note: Validation always uses saved data, not unsaved form values.
Laserfiche Account Info
Enter your Laserfiche Server name, Repository name, Repository Default Volume Name, Laserfiche User, and Laserfiche Password. Click Validate the Credentials.
Workflow Server Info
Enter the Laserfiche Workflow Server Name and Workflow Server Port.
OneSpan Sign Callback Info
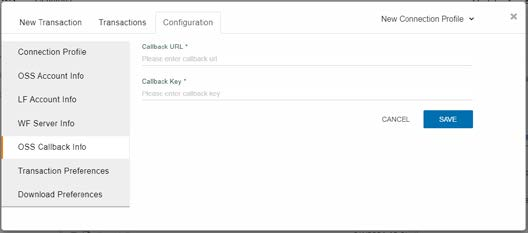
Enter the Callback URL pointing to the Notification Receiver app. Example:
http://your.server.address/OneSpanSignConnectorService/api/Notify
Both HTTP and HTTPS are supported. For the Callback Key, enter any 6–12 alphanumeric character string.
Transaction Preferences
Click the Default Sender Email field to load a list of available senders from your OSS account. Select one as the default sender.
Download Preferences
Configure where signed documents and evidence summaries are saved after a transaction completes. See the Web Client User Guide for full details on download options.
Workflow Configuration
1. Add the PackageStatus_OSS field to the repository
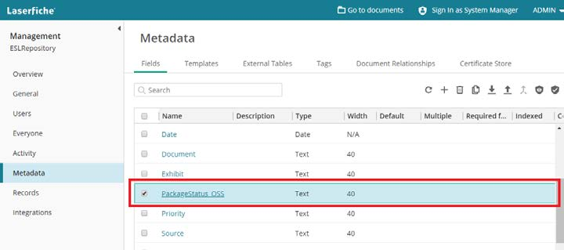
In Laserfiche Administration, navigate to Metadata → Fields and create a new field:
Property | Value |
|---|---|
Name | PackageStatus_OSS |
Type | Text |
Width | 40 |
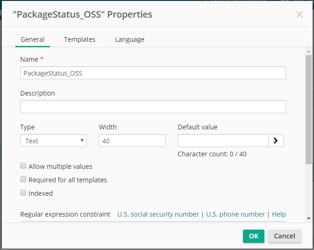
Leave all other settings at their defaults and click OK.
2. Register the custom activity DLLs in Workflow Administration Console
The custom activity files are located in your Workflow installation directory under the OneSpanSign folder, for example:
C:\Program Files\Laserfiche\Laserfiche Workflow 11\OneSpanSign
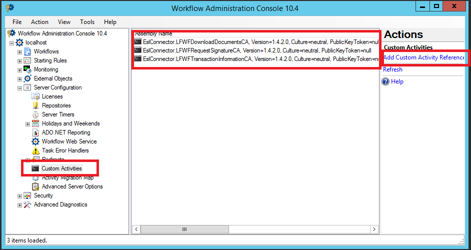
Open the Workflow Administration Console.
Navigate to Server Configuration → Custom Activities.
In the Actions panel, click Add Custom Activity Reference.
Browse to the OneSpanSign folder and add all DLL files.
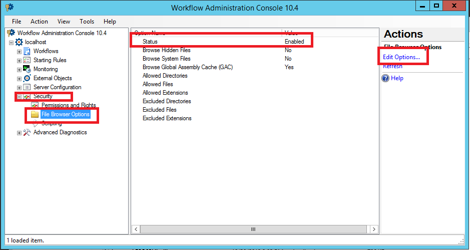
Note: File browsing must be enabled under Security → File Browser Options in the Workflow Administration Console before you can add DLL references.
3. Add the custom activities in Workflow Designer
Open the Workflow Designer.
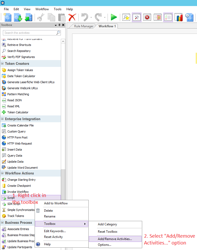
Right-click anywhere in the Toolbox panel.
Select Toolbox → Add/Remove Activities…
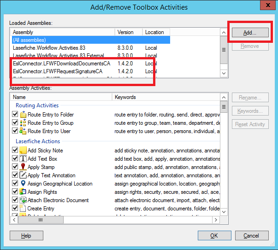
In the Add/Remove Toolbox Activities window, click Add and select the OneSpan Sign DLL assemblies.
Click OK.
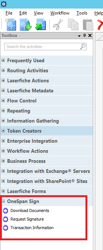
The activities will automatically appear under a new OneSpan Sign group in the Toolbox, containing:
Download Documents
Request Signature
Transaction Information