CloudPrerequisites
OneSpan Sign account. Sandbox account is preferred for testing.
Laserfiche Cloud account information (Client ID, Username & Password)
Installation Steps
1. Download Integration
Download the latest version of the integration from the provided link.
Unzip the package in your desired location.
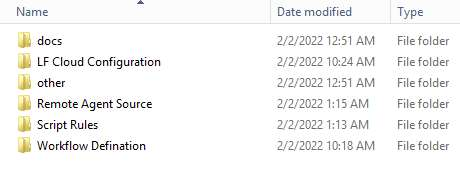
The unzipped folder will contain the following structure:
Name | Type |
docs | File folder |
LF Cloud Configuration | File folder |
other | File folder |
Remote Agent Source | File folder |
Script Rules | File folder |
Workflow Definition | File folder |
2. Create Remote Agent
Log in to Laserfiche Cloud: https://app.laserfiche.ca
Go to Process Automation.
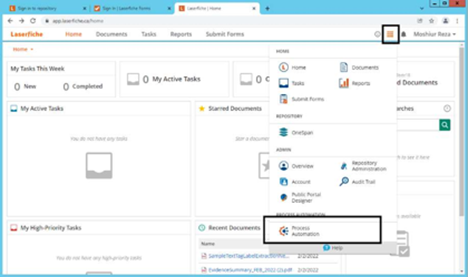
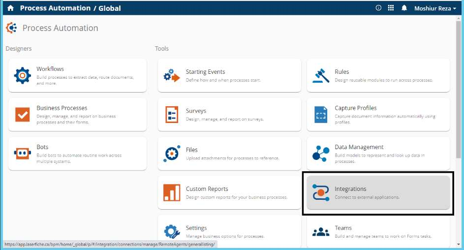
Go to Integrations.
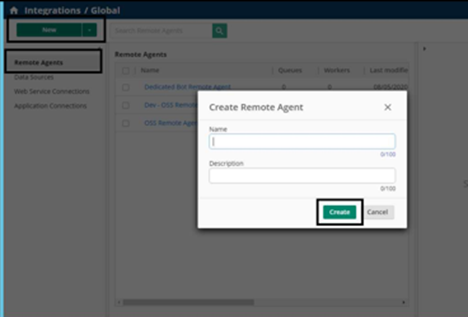
Create a Remote Agent (provide a Name and optional Description, then click Create).
Open the newly created Remote Agent.
Go to the Workers tab.
Expand the Installation Steps block.
Click Download to download the Remote Agent installer.
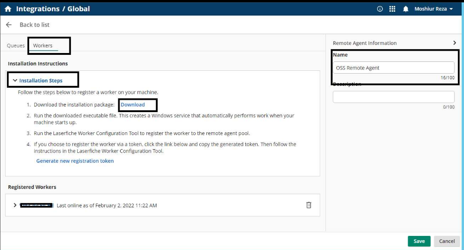
Run the installer and follow the on-screen steps to install the Remote Agent.
After installation, register your worker using the Laserfiche Worker Configuration Tool.
You may register via credentials or via a token (click Generate new registration token for the token method).
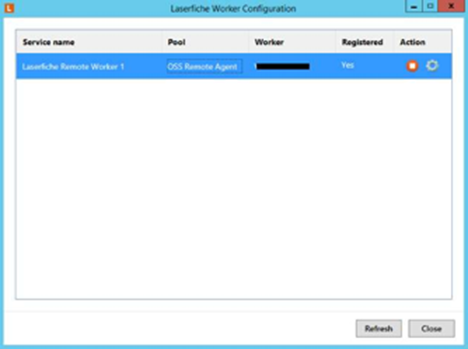
Once registered, the worker will appear under Registered Workers with a status of Online.
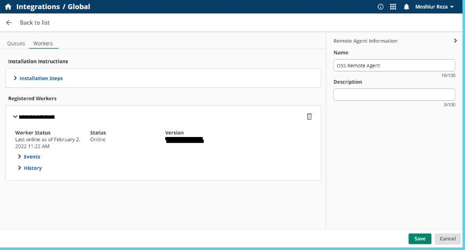
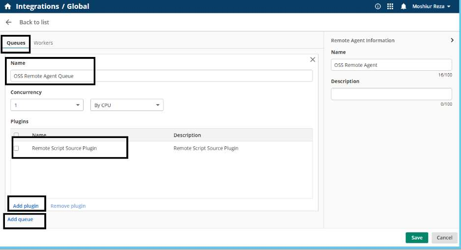
Go to the Queues tab.
Add a Queue.
Under the queue, add a plugin of type Remote Script Source Plugin.
Save all changes.
3. Create Rules
Go back to Process Automation Home.
Go to Rules.
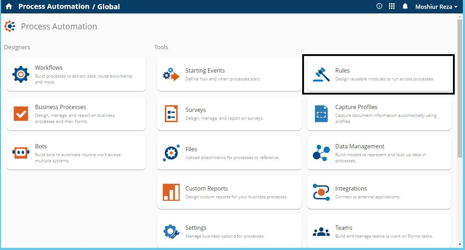
Import Rules from the OneSpan Sign installation files:
Click Import and select the file located at:
Installation files\\Script Rules\\OSS Script Rules.bri
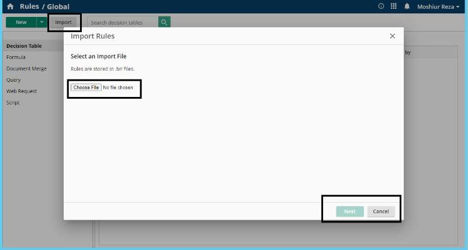
Follow the import steps. You will have 4 Rules imported from OneSpan Sign:
Check Transaction Status
(additional rule)
Download Documents
OSS Tokens
Request Signature
Go to the Script link to find the imported Script Rules.
Open each Rule and:
Confirm the correct Remote Agent is tagged.
Click Publish to publish the rule.
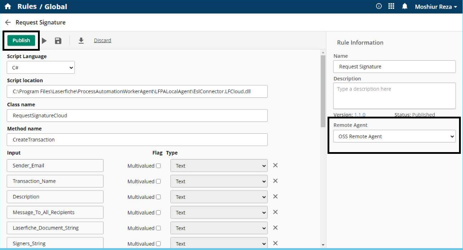
4. Create Sample Workflow
Go back to Process Automation Home.
Go to Workflows.
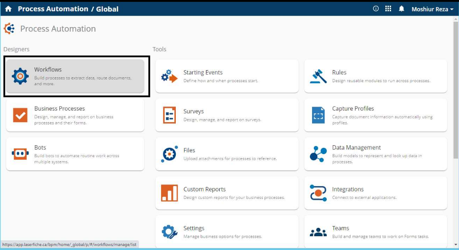
Import the sample Workflow definition from the OneSpan Sign installation files:
Click Import and select the file located at:
Installation files\\Workflow Definition\\OSS For LF Cloud.wfiFollow the import steps.
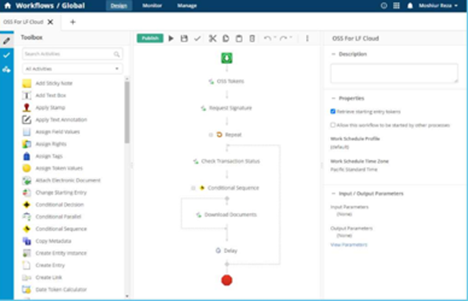
OSS Tokens
Request Signature
Repeat (loop)
Check Transaction Status
Download Documents
Conditional Sequence
Delay
The imported sample workflow should contain the following activities in sequence:
5. Add OSS DLLs to Remote Agent
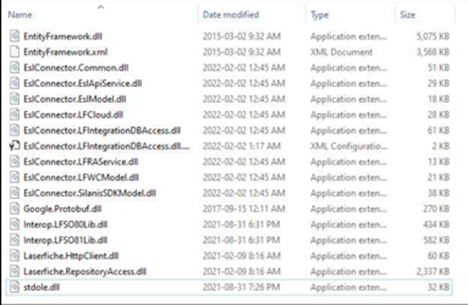
Copy all files from:
Installation files\Remote Agent Source
to:
C:\Program Files\Laserfiche\ProcessAutomationWorkerAgent\LFPALocalAgent
The following files should be copied:
6. Generate Configuration File
Navigate to: Installation files\\LF Cloud Configuration
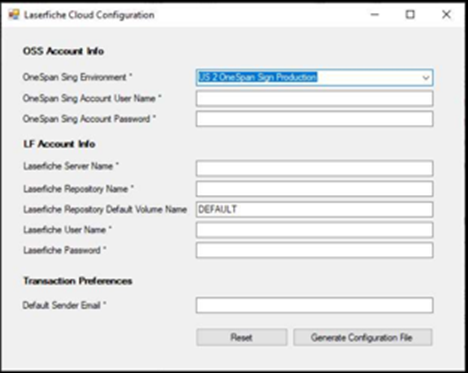
Run ESLConnector.LFCloudConfiguration.exe.
Fill in the required fields:
OSS Account Info
OneSpan Sign Environment
OneSpan Sign Account User Name
OneSpan Sign Account Password
LF Account Info
Laserfiche Server Name
Laserfiche Repository Name
Laserfiche Repository Default Volume Name (default: DEFAULT)
Laserfiche User Name
Laserfiche Password
Transaction Preferences
Default Sender Email
Click Generate Configuration File.
A configuration file named OSSLFCouldIntegrationConfig.txt will be created in the same folder.
7. Copy Configuration File
Copy OSSLFCouldIntegrationConfig.txt to:
C:\Program Files\Laserfiche\ProcessAutomationWorkerAgent\LFPALocalAgent
8. Test Run
Go back to the workflow.
Confirm all activities have the proper rules tagged.
Click Publish to publish the workflow.
Run the workflow to verify the integration is working correctly.